Easy Homemade Soft Pretzels: Bakery Quality in Your Kitchen
There's something truly magical about the aroma of freshly baked pretzels wafting through your home. That warm, golden-brown crust, the satisfyingly chewy interior, and the perfect sprinkle of coarse salt – it’s an experience that transports you straight to a bustling bakery or a lively street fair. What if we told you that achieving this bakery-quality bliss is not only possible but surprisingly simple right in your own kitchen? Get ready to discover how to make irresistible homemade soft pretzels that are easy, rewarding, and utterly delicious.
For many, the crisp air of autumn brings an undeniable urge to bake. While traditional baked goods often come to mind, a batch of soft, puffy pretzels can become an unexpected, delightful tradition. This recipe has been refined over time to make the process approachable even for beginner bakers, ensuring that everyone can enjoy the irresistible payoff of a homemade treat that tastes incredibly impressive. Prepare to master the art of making easy homemade soft pretzels that boast a glossy finish, a perfect chew, and just the right amount of saltiness.
Why Bake Your Own Easy Homemade Soft Pretzels?
Beyond the sheer joy of eating them, there are numerous compelling reasons to embark on the journey of making your own soft pretzels. First and foremost is the unparalleled freshness. Pretzels are at their absolute best straight from the oven, warm and tender. Store-bought versions, no matter how good, simply can't compare to the melt-in-your-mouth texture and vibrant flavor of a pretzel still radiating warmth.
Secondly, baking at home gives you complete control over the ingredients. You know exactly what's going into your pretzels, allowing you to choose high-quality components and even adjust salt levels or add unique seasonings. This can be particularly appealing for those with dietary considerations or simply a preference for wholesome ingredients. Moreover, the sense of accomplishment you feel when pulling a tray of perfectly golden, twisted pretzels from the oven is incredibly satisfying. It’s a rewarding culinary experience that nurtures creativity and builds confidence in the kitchen.
Finally, making easy homemade soft pretzels is surprisingly cost-effective. While specialty pretzels can be pricey, the basic ingredients are staples in most pantries, making this a budget-friendly way to enjoy a gourmet snack. It's a fantastic activity for families, transforming a simple recipe into a fun, interactive event that creates lasting memories – and delicious treats!
The Foundation: Crafting the Perfect Dough for Your Soft Pretzels
The secret to a truly exceptional soft pretzel lies in its dough. This recipe simplifies the process, focusing on minimal ingredients and straightforward steps to ensure that classic chewy texture that makes soft pretzels irresistible. You'll need just a few basic items:
- Warm water (around 105-115°F / 40-46°C)
- Granulated sugar
- Fine grain salt
- Active dry yeast
- All-purpose flour
- Melted unsalted butter
To begin, combine the warm water, sugar, and fine grain salt in the bowl of a stand mixer. Give it a quick whisk, then sprinkle in the active dry yeast. Let this mixture sit for about 5-10 minutes until the yeast begins to bubble and foam, indicating it's active and ready to work its magic. This bubbling is a crucial sign that your dough will rise beautifully.
Once the yeast is bubbly, add the flour and melted butter to the bowl. If you have a stand mixer, now is its time to shine! Fitted with the dough hook, it's by far the easiest and most reliable way to achieve a smooth, elastic dough. The mixer kneads the dough efficiently, saving you time and effort while ensuring the gluten develops properly. This gluten development is key to the pretzel's signature chewy bite. Continue mixing until the dough pulls away from the sides of the bowl and forms a cohesive, slightly tacky but manageable ball.
Proofing for Perfection
After kneading, transfer your newly formed dough to a lightly greased bowl. Turn the dough once to coat it evenly, then cover the bowl with plastic wrap or a clean kitchen towel. Place it in a warm spot to rise until it has doubled in size, which typically takes about 1 hour. This resting period is where the yeast truly transforms the dough, building complex flavors and creating the light, airy texture that perfectly balances the pretzel's hearty chew.
Pro Tip for Quicker Proofing: For those who want to speed up the process slightly, your oven can be a fantastic tool. Preheat your oven to its lowest setting, usually around 170°F (75°C), then turn it off. Wait about 5 minutes for the residual heat to mellow, then place your covered dough bowl inside. The consistent, gentle warmth will help the dough proof in a shorter timeframe, often around 40-45 minutes. Remember to ensure your bowl is oven-safe!
The Art of Shaping and the Essential Pretzel Bath
Once your dough has gloriously risen, it's time for the most enjoyable and distinctive part of making pretzels: shaping! This is where your beginner-friendly soft pretzels: achieve perfect chewy bites begin to take their iconic form.
First, gently punch down the dough to release the air. Transfer it to a lightly greased work surface and divide it into eight equal pieces. It's helpful to keep the pieces you're not actively working with covered with a damp towel to prevent them from drying out. Take one piece of dough and begin rolling it into a long, thin rope, approximately 24 inches in length. If the dough resists and springs back, let it rest for a few minutes under the damp towel. This allows the gluten to relax, making it easier to roll without tearing.
Shaping the Classic Pretzel Twist:
- Form the rope into a large "U" shape, with the curve pointing away from you.
- Cross the two ends of the "U" over each other once.
- Cross them over again, so they twist twice in the center.
- Firmly press the twisted ends down onto the bottom curve of the "U" (imagine 4 o'clock and 8 o'clock on a clock face) to secure the shape.
Don't fret if your first few pretzels aren't perfectly symmetrical. The beauty of homemade baking is often found in its rustic charm. With a little practice, your twists will become more uniform, but even the "wonky" ones will bake up beautifully chewy and golden.
Beginner's Shaping Hack: For smoother handling and easier transfer to the baking sheet, consider this clever trick. After shaping each pretzel, gently place it onto a small 5x7-inch square of parchment paper. This allows you to easily lift and move the delicate, unbaked pretzels without distorting their shape, especially helpful before the pretzel bath.
The Crucial Pretzel Bath (Lye-Free Option)
This next step is what truly defines a soft pretzel, giving it that characteristic glossy, deeply golden crust and unique flavor: the baking soda bath. While traditional German pretzels use lye, a highly corrosive chemical, a baking soda solution offers a safe and highly effective alternative for home bakers.
Bring a large pot of water to a rolling boil. Carefully add about 1/2 cup of baking soda to the boiling water (it will foam up, so use a large pot). Gently drop one or two shaped pretzels into the boiling solution, ensuring they don't overcrowd the pot. Let them simmer for approximately 20-30 seconds per side. This quick boil causes a chemical reaction on the dough's surface, promoting that desired browning and chewy exterior during baking.
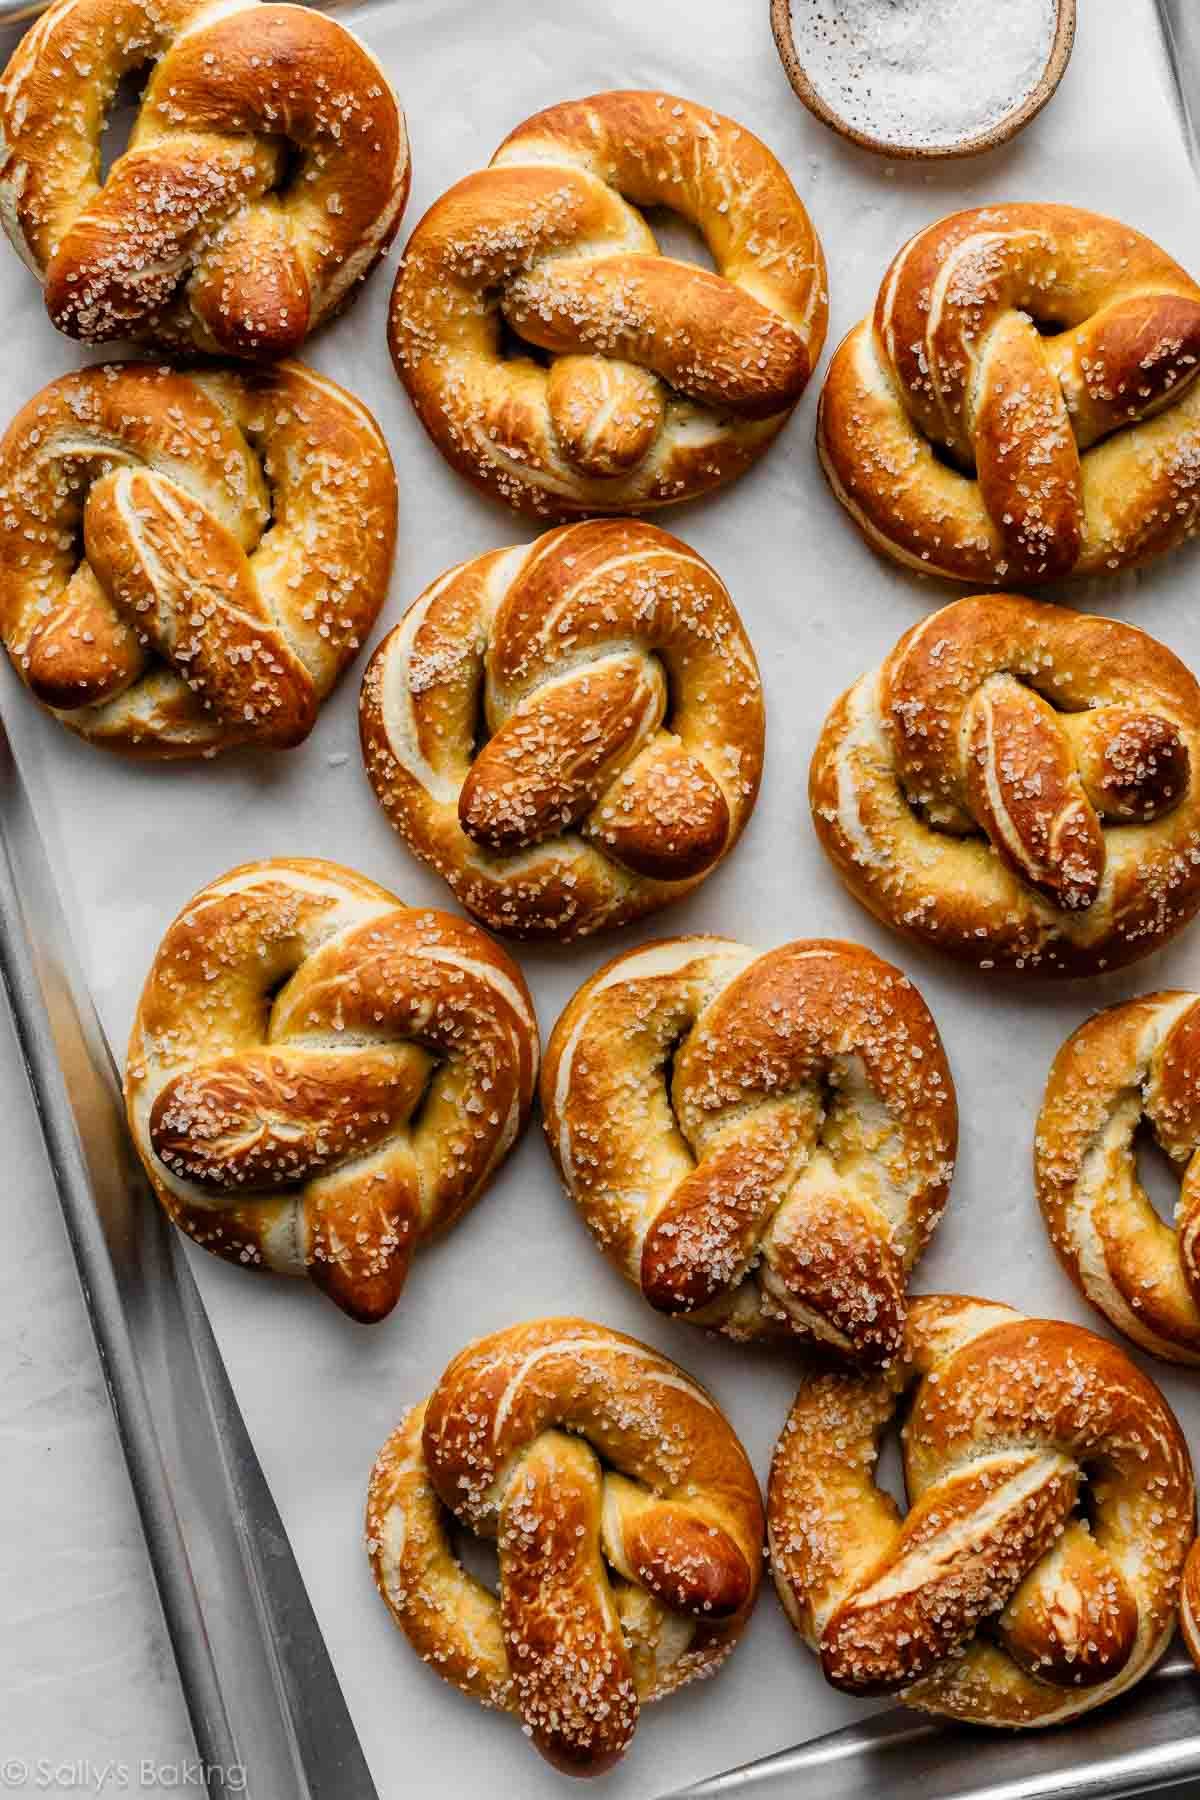
Using a slotted spoon, carefully remove each pretzel from the bath, allowing excess water to drip off. Immediately transfer them to a baking sheet lined with parchment paper. Now is the time to generously sprinkle them with coarse pretzel salt. The wet surface helps the salt adhere perfectly.
Baking Your Way to Golden Perfection & Serving Suggestions
With your pretzels shaped, bathed, and salted, they are ready for their final transformation in the oven. Preheat your oven to a high temperature, typically around 400-425°F (200-220°C). For an extra golden sheen and slightly crisper crust, you can brush the pretzels with an egg wash (one egg yolk whisked with a tablespoon of water) just before baking, though this is optional.
Bake the pretzels for 12-15 minutes, or until they are puffed up, deeply golden brown, and absolutely irresistible. Keep an eye on them towards the end of the baking time, as oven temperatures can vary. The rich, inviting aroma filling your kitchen will be your delicious reward!
Once baked, transfer the pretzels to a wire rack to cool slightly. While they are delicious at any temperature, soft pretzels are truly at their peak when served warm, fresh from the oven. Their chewy texture and savory goodness are best enjoyed immediately. But the enjoyment doesn't stop there! Homemade soft pretzels are incredibly versatile and pair wonderfully with a variety of dips and accompaniments:
- Classic Savory: A robust spicy brown mustard, whole grain mustard, or a creamy beer cheese dip.
- Sweet Delights: A simple cream cheese glaze, cinnamon sugar butter (melted butter mixed with cinnamon and sugar), or even a warm chocolate sauce for a decadent treat.
- Unexpected Pairings: Marinara sauce for a pizza-like twist, or a savory spinach and artichoke dip.
If you happen to have any leftovers (a rare occurrence!), store them in an airtight container at room temperature for a day or two. Reheat them briefly in a toaster oven or microwave for a few seconds to restore some of their softness and warmth.
Conclusion
Making easy homemade soft pretzels is a journey that’s as delightful as the destination itself. From the simple act of mixing the dough to the satisfying twist of shaping and the final golden bake, each step brings you closer to a bakery-quality treat you created with your own hands. This recipe proves that you don't need to be a seasoned baker to produce impressive results. So, next time that craving for something warm, chewy, and utterly delicious strikes, ditch the thought of the store-bought version. Embrace the simplicity, savor the aroma, and enjoy the unparalleled taste of your very own homemade soft pretzels. It's a culinary experience that's sure to become a beloved tradition in your home.
