Irresistible Homemade Soft Pretzels: Simple Steps to Golden Perfection
There’s something undeniably magical about biting into a warm, chewy soft pretzel, its golden crust glistening with coarse salt. That quintessential snack, often associated with bustling bakeries and street vendors, might seem like a complex culinary feat reserved for professional bakers. But what if we told you that achieving that perfect balance of crispy exterior and tender interior is entirely within reach in your own kitchen? This comprehensive guide will walk you through crafting truly irresistible and
easy homemade soft pretzels, transforming a seemingly daunting task into a delightful baking adventure. Prepare to impress your taste buds and loved ones with bakery-quality pretzels made right at home! If you're looking for even more tips on achieving professional results, check out our guide on
Easy Homemade Soft Pretzels: Bakery Quality in Your Kitchen.
Why Homemade Soft Pretzels Are a Must-Try
Beyond the sheer joy of a freshly baked treat, making soft pretzels at home offers a multitude of benefits. For starters, the aroma alone as they bake is enough to make any house feel like a cozy, inviting home. You also gain complete control over the ingredients, opting for high-quality flour, pure butter, and the perfect amount of salt to suit your preference. Furthermore, it's a surprisingly cost-effective way to enjoy a gourmet snack, and the process itself can be incredibly rewarding, especially when shared with family. Many assume homemade pretzels are complicated, but this recipe is designed to be approachable, even for beginner bakers. The satisfaction of pulling a tray of perfectly golden, delightfully chewy pretzels from your oven is unparalleled.
The Foundation: Crafting Your Perfect Pretzel Dough
The secret to any great pretzel lies in its dough – a simple yet powerful combination of ingredients that, when properly handled, creates that signature chewy texture. Our recipe for
easy homemade soft pretzels starts here, building a robust foundation for success.
Essential Ingredients for Success
*
Warm Water: Crucial for activating the active dry yeast. Aim for a temperature between 105-115°F (40-46°C). Too hot will kill the yeast; too cold won't activate it.
*
Granulated Sugar: Feeds the yeast, helping it to activate and proof, and also contributes to the pretzels' golden-brown crust.
*
Fine Grain Salt: Balances the flavors and helps control yeast activity.
*
Active Dry Yeast: The leavening agent that makes your pretzels soft and puffy.
*
All-Purpose Flour: The primary structural component, providing gluten for chewiness.
*
Melted Butter: Adds richness, tenderness, and a subtle depth of flavor.
Mixing and Kneading: The Heart of the Dough
In the bowl of a stand mixer, combine your warm water, sugar, and fine grain salt. Give it a quick whisk, then sprinkle the active dry yeast over the top. Let it sit for about 5-10 minutes until the yeast becomes bubbly and foamy – this indicates it’s alive and ready to work its magic.
Next, add your flour and melted butter. Using a stand mixer fitted with the dough hook is highly recommended. It’s by far the easiest and most reliable way to achieve a smooth, elastic dough without significant arm strain. Knead for about 5-7 minutes on medium-low speed. The dough should pull away from the sides of the bowl, feel soft and pliable, and pass the "windowpane test" (where a small piece can be stretched thin enough to see light through it without tearing). This proper gluten development is key to that classic chewy bite. If you don't have a stand mixer, you can knead by hand on a lightly floured surface for 8-10 minutes until the dough is smooth and elastic.
The Magic of Proofing and Shaping
Once your dough is perfectly kneaded, it’s time for the first crucial step: the rise. This stage allows the yeast to ferment, building flavor and developing the pretzel's characteristic texture.
The Art of the Rise: Achieving Lightness
Transfer your freshly kneaded dough to a lightly greased bowl, turning it once to coat. Cover the bowl tightly with plastic wrap or a damp kitchen towel and place it in a warm, draft-free spot. Let it rise for approximately 1 hour, or until it has visibly doubled in size.
Pro Tip for Quicker Proofing: If your kitchen is cool, you can use your oven as a makeshift proofing box. Preheat your oven to its lowest setting (usually around 170°F/75°C), then turn it OFF. Wait 5 minutes for the intense heat to dissipate slightly. Place your covered dough bowl inside the warmed oven. This gentle warmth can reduce proofing time to about 40-45 minutes.
Mastering the Twist: Shaping Your Pretzels
This is arguably the most fun part! Lightly grease your work surface. Gently punch down the risen dough to release the air, then divide it into eight equal pieces. It helps to use a kitchen scale for precision, ensuring even baking. Keep the pieces you’re not working with covered with a damp towel to prevent them from drying out.
Take one piece of dough and roll it into a long, thin rope, approximately 24 inches (60 cm) in length. If the dough springs back and resists rolling, cover it with the damp towel for a few minutes to allow the gluten to relax, then try again.
To shape:
1. Form the rope into a large "U" shape, with the open ends pointing towards you.
2. Cross the two ends over each other once.
3. Cross them over again, so they twist twice in the center.
4. Firmly press the twisted ends down onto the bottom curve of the “U” (imagine 4 o'clock and 8 o'clock on a clock face) to secure the shape.
Gently transfer each shaped pretzel to a parchment-lined baking sheet. Don’t fret if your first few aren’t perfectly symmetrical – the rustic charm of homemade pretzels is part of their appeal! With practice, your twists will become more uniform. For those who want a truly
Beginner-Friendly Soft Pretzels: Achieve Perfect Chewy Bites, shaping them directly onto 5x7 inch parchment squares can make transferring them after the boil much easier.
The Critical Baking Soda Bath
This step is non-negotiable for authentic soft pretzels! A quick dip in a boiling baking soda solution is what gives pretzels their distinct dark, glossy crust, unique flavor, and contributes to their chewy texture. Without it, you'd simply have bread sticks.
Bring a large pot of water (about 8-10 cups) to a rolling boil. Carefully add ½ cup of baking soda. The mixture will foam up significantly – this is normal. Reduce the heat slightly to maintain a gentle boil.
Working with one or two pretzels at a time (don't overcrowd the pot), carefully submerge each pretzel in the boiling solution for 20-30 seconds per side, or 45-60 seconds total. Using a slotted spoon or spider, carefully lift the pretzel, allowing excess water to drain off, and return it to the parchment-lined baking sheet.
Baking to Golden Perfection and Beyond
Once all your pretzels have enjoyed their baking soda bath, they’re ready for their final transformation in the oven.
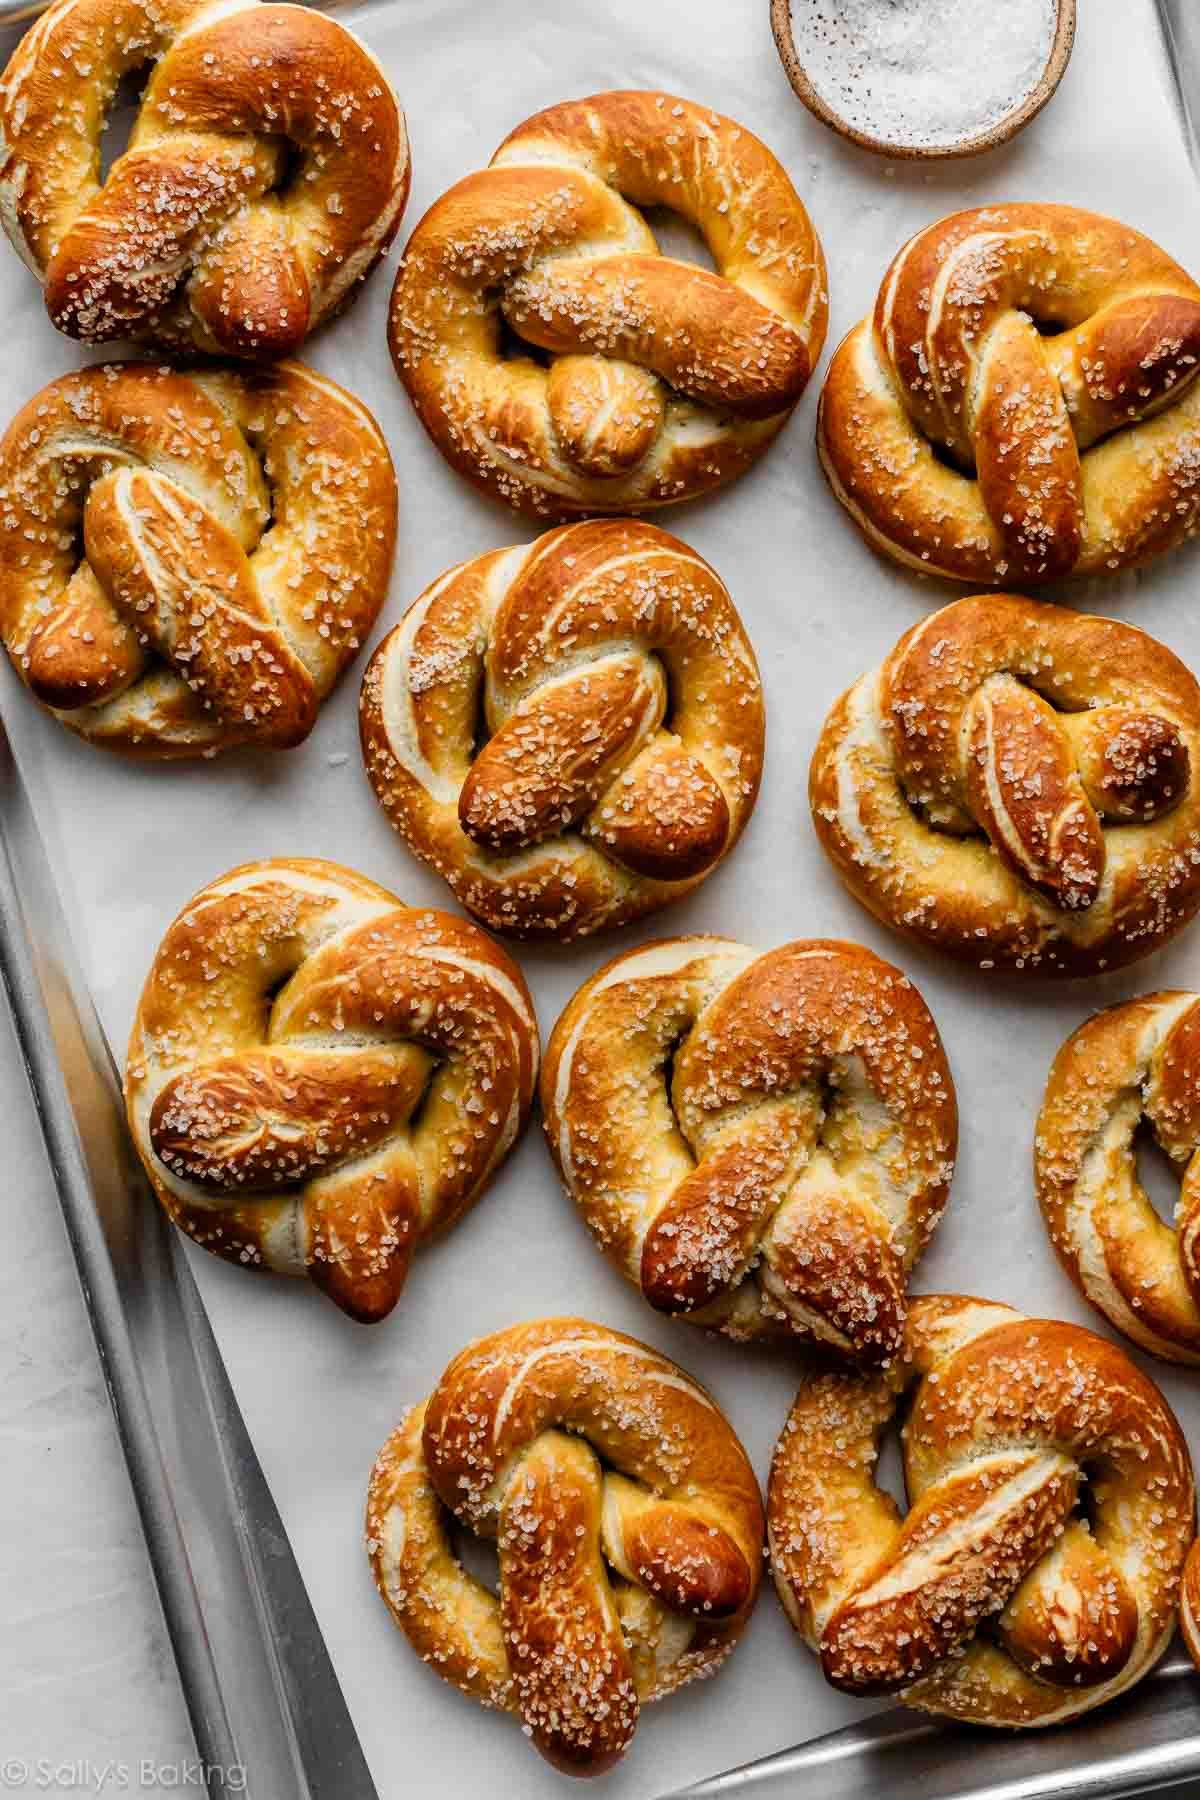
Achieving That Signature Golden Crust
Preheat your oven to 450°F (230°C). While the oven preheats, you can prepare an optional egg wash (one egg beaten with 1 tablespoon of water) and brush it lightly over each pretzel. This enhances their golden color and shine. Immediately after the egg wash (or directly after the bath if skipping the egg wash), generously sprinkle each pretzel with coarse pretzel salt.
Bake for 12-15 minutes, or until the pretzels are deeply golden brown. Keep a close eye on them during the last few minutes, as ovens can vary. The internal temperature of a perfectly baked pretzel should be around 200°F (93°C).
Serving Suggestions and Customization
The best way to enjoy these
easy homemade soft pretzels is fresh from the oven, still warm and slightly steamy. Serve them simply with your favorite mustard (dijon, spicy brown, or honey mustard are popular choices), or get creative!
*
Sweet Pretzels: Instead of coarse salt, brush baked pretzels with melted butter and sprinkle with cinnamon sugar.
*
Cheesy Pretzels: After the baking soda bath and egg wash (skip the salt), sprinkle with shredded cheddar or Monterey Jack cheese before baking.
*
Everything Pretzels: Use everything bagel seasoning instead of coarse salt for a savory twist.
*
Dips: Beyond mustard, consider a warm cheese dip, marinara sauce, or even a sweet cream cheese frosting for dessert pretzels.
Leftover pretzels can be stored in an airtight container at room temperature for up to 2 days or frozen for longer storage. To reheat, a few minutes in a toaster oven or regular oven at 350°F (175°C) will bring them back to life.
Conclusion
Baking
easy homemade soft pretzels is more than just following a recipe; it's an experience that fills your kitchen with warmth, your senses with delightful aromas, and your table with an incredibly satisfying treat. From the initial mix of humble ingredients to the glorious moment they emerge from the oven, golden and gleaming, each step is approachable and rewarding. So, the next time you crave that iconic salty, chewy snack, skip the store and embrace the joy of making them yourself. You'll be amazed at how simple it is to achieve bakery-quality perfection right in your own home, creating delicious memories that will last long after the last bite.